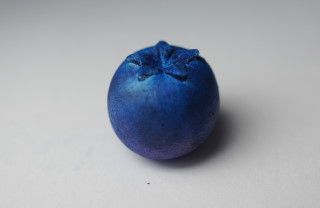
Blueberry Tutorial
Created by: Heather of Sweet & Savory Trinkets
Level: Beginner
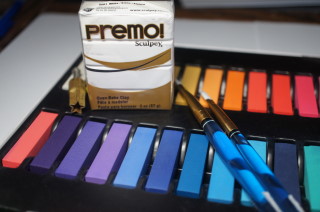
Materials:
1 - 2oz Package of White Premo
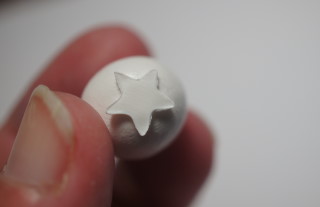
Small Star Pattern Cutter 8mm From Point to Point (For Charm Size)
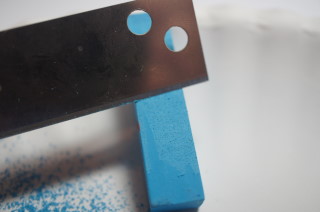
1 Sculpey Super Slicer Rigid Straight Blade
Pastels in Blue, Purple, Pink, and Aqua
Soft Acrylic Paint Brushes
A Few Sheets of White Paper
Baking Tray
Sculpey Gloss or Satin Glaze
Safety Pin
Ruler or Measuring Tape
Before We Begin: The star cutter I use is the Kemper ⅜ star pattern cutter. I purchased mine from the clay factory online. Any star cookie or clay cutter close to that size will work. I use it to make the bottom of the blueberry. If you don’t mind the bottom being flat you can make a pretty blueberry without creating the bottom portion.
A note on the plain white paper. I use it as my work surface throughout this project, and I bake my pieces on paper on the baking sheet. This keeps the pieces matte. If they are baked on glass, and metal the clay tends to come out shiny where they meet.
Step 1: Condition the clay thoroughly. Remove a small portion and roll it into a ball. Let them rest a couple of hours to get a little firm.
Charm size 13-14 mm
12th scale size 1mm (look at the notes at the end of the tutorial before following the instructions for scale blueberries)

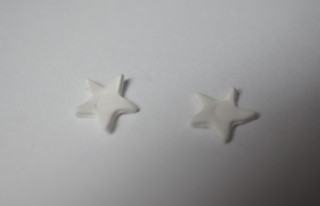
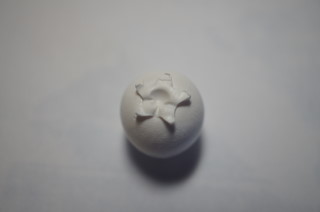
Step 2: For the charm sized blueberry, flatten a small portion of conditioned clay on your paper. Cut out a star with your pattern cutter.
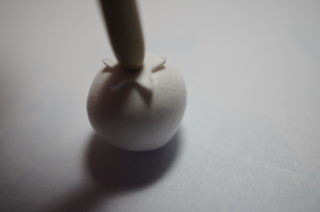
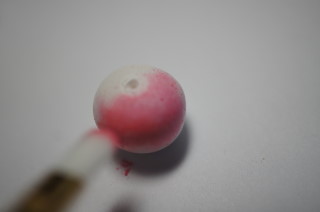
Step 3: Place the star on the tip of your index finger. Place the star on the bottom of your ball. using the end of your paint brush gently indent the bottom of your star into the circle slightly. It works well if you twist the paintbrush as you are gently pressing into the ball. Twisting it will help keep the paint brush from sticking to the clay.
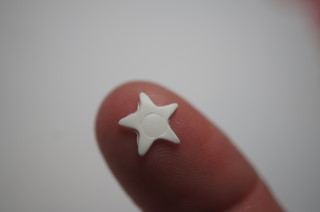

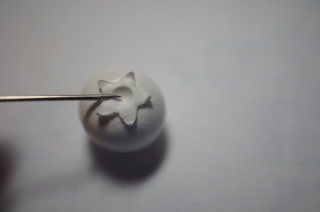
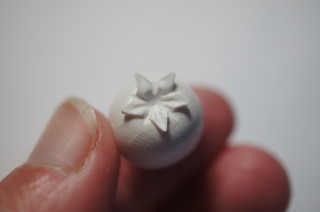
Step 4: Lift the point of the star gently away from the ball
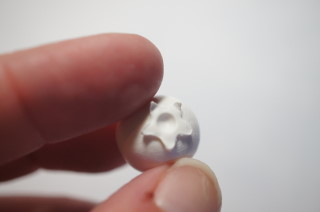
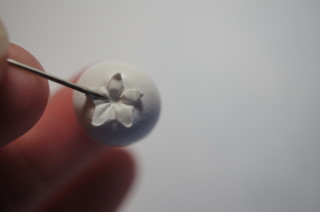
Step 5: Using your safety pin press down between each of the points of the star (there are 5).

Step 6: Now use the safety pin to make a slight indentation at the base of each star point (there are 5).
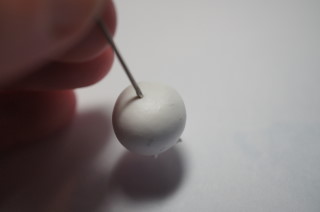
Step 7: Turn the ball over gently, using the safety pin make a tiny hole in the top and rotate gently to create the top portion of your blueberry (where the stem was before it was picked).

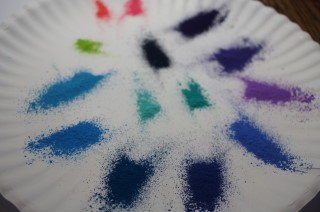
Step 8: Using your straight rigid slicer, scrape pastel dust in shades of aqua, blue, purple, and pink. If you want some under ripe you can also add a yellow-green.
You may have been wondering why I used white you the blueberries. I enjoy gardening, I am not very good at it.. but the fruit and veggies I grow change in color as they ripen. Many of them have subtle shade and color differences even when ripe. Blueberries (in my garden) start green, and get a rosy blush, they start to turn the dark blue, but often there will be pink hues. Blueberries also tend to have a almost dusty look. Instead of trying to make a blue clay blueberry and catch different hues, I start with white and use it like a blank canvas. ** I highly suggest reading through the rest of the steps before actually doing them. We work on the highlights first, gradually getting darker as you paint the pastel on.
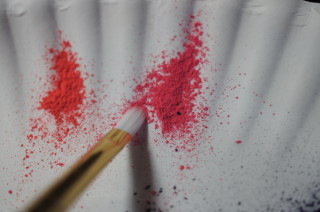
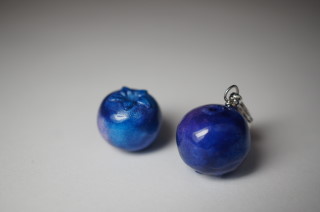
Step 9: The fun part. Using your paintbrush tap one of the lighter colors and start dabbing the blueberry with it. **We are making the highlights now. I generally keep the highlights on the top half of the blueberry, often more on one side (where the sunlight would fall on the blueberry while it was growing). Some may be just on top, some more on the side. If you are making multiple blueberries make a few of each to see what you like best. I will give you a couple of color variations at the end, with the list of colors in their order.
Step 10: Dip your paintbrush in a new color and dab the new color on the blueberry. If you are using a secondary highlight color, dab it on the edges of the original color, and extending a bit into the white unpainted section.
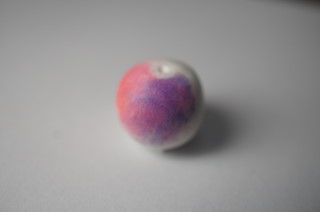
Step 11: Dip your paintbrush into the next color and dab the new pastel onto the blueberry, leaving a portion of the highlight unpainted. Repeat this step in as many colors as you wish
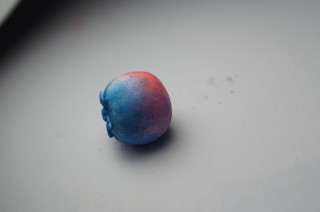

Step 12: Dip the paintbrush into the darkest shade you wish to use and paint the bottom of the blueberry, and small portions around the side leaving portions of the previous colors unpainted to retain the highlights.


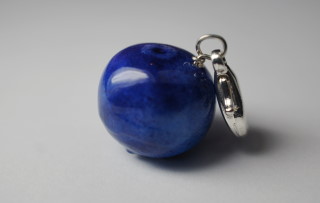
Step 13: Bake your blueberries according to manufacturers instructions.
After you remove them and allow them to cool completely paint them with your choice of matte, satin, or gloss glaze to protect the painted surface.
Variations:
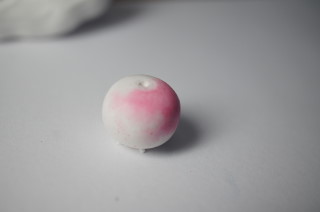
Pink Highlight:
Coral -highlight, bright pink -highlight, light purple - secondary highlight
Periwinkle blue- all over except highlighted area
Teal on bottom, and sporadic, dark blue - all over
Navy blue all over except highlight.
Green highlight:
Yellow-green -highlight, light purple secondary highlight
periwinkle - all over sporadic
Teal - all over, Dark blue - all over
Navy Blue - All over except highlight
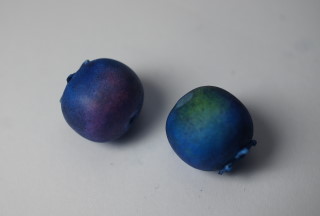
The left is pink highlights, the right yellow-green highlights
**** Have you noticed the bottom is similar to the top of a tomato? There are many variety of tomatoes. I would paint the tomatoes in the same way. I work from the lightest to the darkest colors. I would paint the tomato before adding the star.. You can paint the top of the star in green and brown before attaching it, or you can condition a green premo clay and attach it the same way we do here, just do it after you paint the tomato.
***A note on 12th scale miniatures. When I give you measurement to create 12th scale foods, I measure the real life item. For example, the blueberries in my garden measure 12-14mm across. I then devide the mm measurement by 12. In this case it would be 1mm to just over 1mm.
If you wish to make blueberries in 12th scale, it will be quite difficult to create the bottom of the blueberry. I would personally just make the top with the safety pin as you did in this project.
For color you can use blue polymer clay, or you can use the tiny acrylic paint brushes and paint the blueberry as you did here. If you love making scale miniatures, you may want to create a list of measurements in a document just to have handy.
I would decide which colored clay to use depending on the project.
If I made a basket of blueberries, to scale I would paint them with pastel and use the white clay.
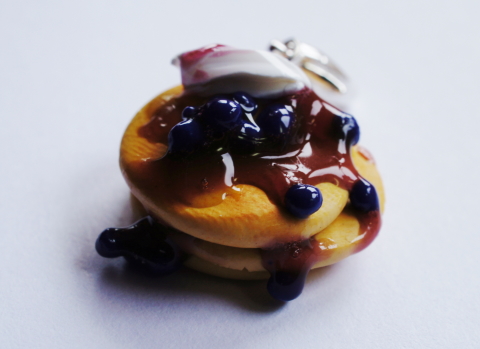
For items I glaze with blueberry syrup, like blueberry cheesecake, waffles, or pie, I would just use blue clay.
Bonus Recipe - Blueberry Syrup
Translucent Liquid Sculpey (TLS)
Pastels - Plum, red, medium blue
Straight rigid sculpey sclicer
Toothpick
To make blueberry syrup scrape some pastel dust of all the colored pastels mentioned. Pour a small amount of TLS on your sheet of paper. You will want to mix mostly plum in with the TLS. If the plum is more purple, add some red and a touch of blue, if it is a rich boysenberry colored plum, just add a touch of blue.
I then use the toothpick to drizzle the blueberry syrup on my tiny food.
I love it! It's so simple I think I could do this one! LOL
ReplyDelete