I was recently asked in my Etsy shop how do you make those little rock candies? I must admit I pondered many ideas, through trial and error I came up with the rock candies you see at the right.
This is definately the easiest of my miniature foods, so I thought it would be a great first tutorial for you all.
Meterials:
Sculpy gloss glaze, powdered food coloring, head pins with a ball at the end, clear micro glass beads, paper plate, a tooth pick, and a sheet of paper.
If you are making it into a charm, you will also need wire cutters, flat nose pliers, and round nose pliers, and a jumpring.
Sculpy gloss glaze was some amazing stuff! Unfortunately they changed the formula. I decided to make the rock candy with the old and new formula to see if the new one will work for the rock candy..
The clear bottle on the left was the old formula, the one on the right is the new formula.. if you happen to see the old formula grab it!! In my opininion it is liquid gold.
The micro glass beads I used were the Martha Stewart brand.
Step 1: Pour some micro beads on a paper plate.
A small pile will do, keep the bottle near though, you will need it.
Step 2: Prepare your headpins
If you are doing miniatures, just cut down the length, mine are 1" long
If you are making the into charms, use the flat nose to form the right angle, and use the round, and flat nose pliers to form and close off the loop. You can add the jumpring later.
There are great tutorials online showing you how to do this . :)
Step 3: Prepare your glaze.
Pour a tiny amount of glaze (size of a dime) on to your sheet of paper.
Dip your toothpick into the food coloring and scoop out a tiny bit.
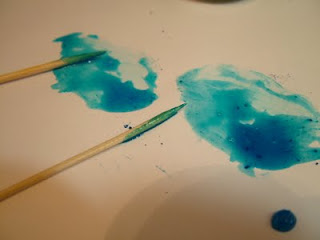
Step 4: With your toothpick stir the food color into your glaze. Thouroughly combine it.
Step 5: Paint the colored glaze on the head pin with your tooth pick.
Now very gently lay it on your small pile of micro beads, and gently pour on additional micro beads (just enough to cover it).
Let it rest for around 8-10 minutes
Step 6: Repeat step 5 :)
Only make sure to paint on the additional glaze very gently.. otherwiseyou will lose your first application.
*** If using the new glaze you will have to wait at least 30 minutes to repeat step 5. You may have to create more colored glaze if yours has dried already.
Let them dry for 24 hours, and they should be ready to go!
The one on the left is the old sculpy gloss, and the one on the right is the new. I just made these now for the tutorial, so I can't vouch for the strength of the new glaze..
I will however test strength after the 24 hours, and report to you back here about the strength.
The new glaze is a dismal failure for this use. It crumbled completely away, no strength at all. I did contact polyform about the formula change. Here is what the chemists response was
“Our new glaze is not going to give her the “candied” look she was going for and it never will give her the three dimensional look.
Not sure we can help her here with this one.
She may have to switch products.”
One other clay artist suggested krylon? triple thick Hopefully this product will work
I hope you have enjoyed my first tutorial :)
If anything here was unclear, please let me know, and I can address any questions the the comment area :) Thanks
Heather


This is impressive - I want to eat them!! =)
ReplyDelete- Natalie
www.thehotgluehangover.com
Excellent, Heather!
ReplyDeleteGreat tutorial! I've been toying with the idea of starting this as another hobby and you are encouraging me!
ReplyDeleteThanks for taking the time to share your awesome talent with us!