Neapolitan Ice Cream Sandwich Tutorial

Created by Heather Wells of Sweet & Savory Trinkets
Materials:
1 - 2oz Package of White Sculpey III
1 - 2oz Package of Translucent Premo
1 - 2oz Package of Burnt Umber Premo
1 - 2oz Package of Ballerina Premo
1 - 2oz Package of Dusty Rose Premo
1 - 2oz Package of Ecru Premo
1 - 2oz Package of Hazelnut Sculpey III
Pasta Roller or Clay Roller
Cocoa Powder
Toothbrush
TLS or Fimo Deco Gel
Straight Rigid Clay Blade
Small DPN or Toothpick
Notes: This is a project that lends itself to making more than one item at a time. The ice cream portion is very basic cane work, and there will be enough for several ice cream sandwiches.
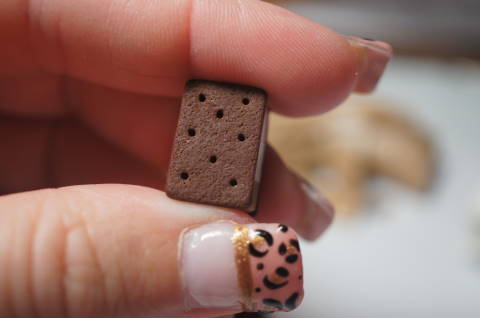
Step 1: Condition some Burnt Umber Premo, and Roll it out to ½ mm thick. Rub a little cocoa powder on the top to keep it from being sticky.
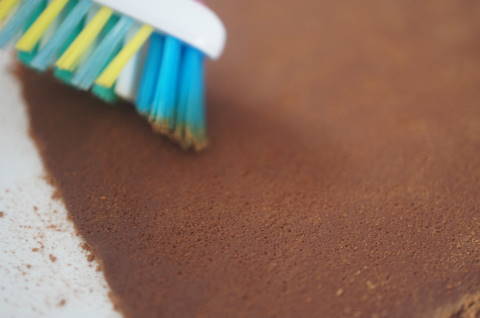
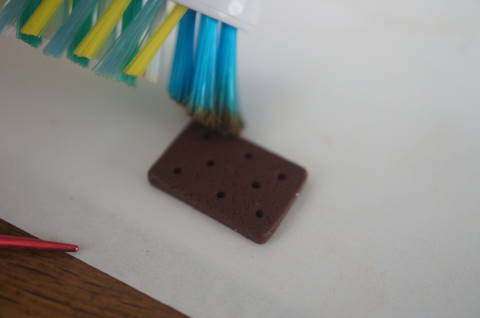
Step 2: Texture the top with your toothbrush.

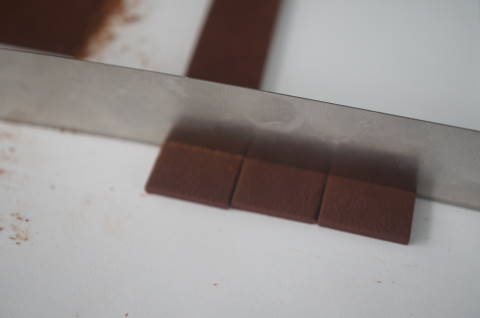
Step 3: Cut out a strip 11mm wide.

Step 4: Cut out a 7mm piece this will give you a rectangle 7mm x 11mm.
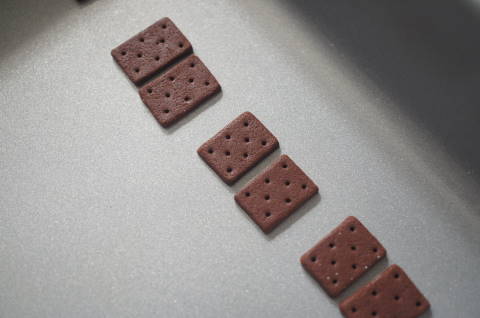
You can continue cutting pieces this size. They do have a tendency to stick to the blade, you can place them next to the new clay as shown instead of measuring each piece.
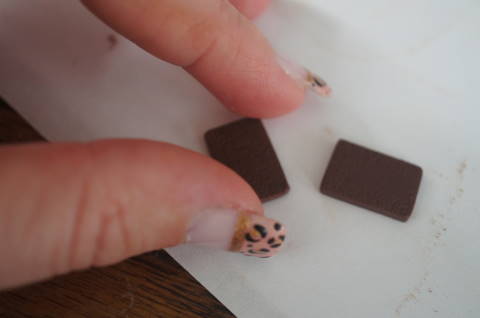
Step 5: Roll the piece very gently in your fingers to round the corner edges.
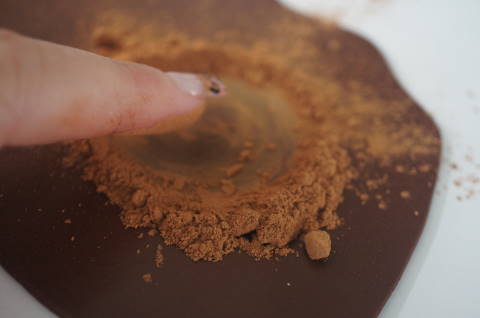
Step 6: Use your DPN, or a toothpick to create the holes. Place a hole near each corner, the towards the outside in the center. Then place 1 hole on each side in the middle of the four holes on each end. Use the toothbrush to gently texture the outer sides of the rectangles. Try not to distort the shape.


Step 7: Place them in pairs on your baking sheet, and bake them according to manufacturer instructions.
Step 8: Scrub your cookie crusts with the toothbrush under water to remove any cocoa powder that may be clinging to the clay. Let them dry thoroughly while you condition the ice cream colors.
Step 9: Condition and mix ½ White Sculpey III, and ½ Translucent Premo for vanilla ice cream.
Step 10: Condition and mix ½ Translucent Premo, ¼ Ballerina Sculpey III, and ¼ Dusty Rose Sculpey III. This is the strawberry ice cream.
Step 11: Condition and mix ½ Translucent Premo, ¼ Ecru Premo, and ¼ Hazelnut Sculpey III.
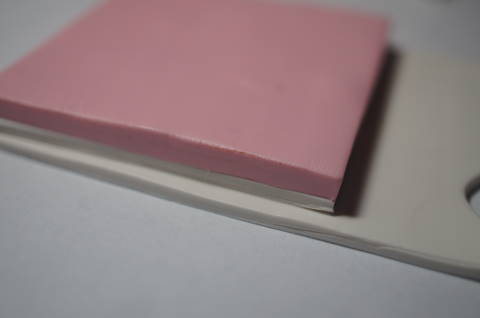
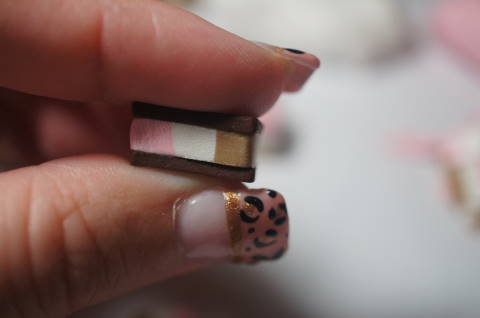
Step 12: Roll out the conditioned ice cream colors on the thickest setting of your pasta roller. Cut them in half, then roll one sheet of each through the 2nd thickest setting on your pasta roller. Stack the two layers of strawberry ice cream together, and cut it into a square or rectangle (I just trim down an area as large as I can while keeping it double layered).

Step 13: Stack the strawberry ice cream on your vanilla ice cream, and trim it to the same size as your strawberry ice cream. Then stack it on the remaining vanilla ice cream and trim the sides again.

Step 14: Repeat step 13 placing the vanilla on the chocolate layers of ice cream.


Step 15: Trim the edges, then cut out a strip 5mm thick.
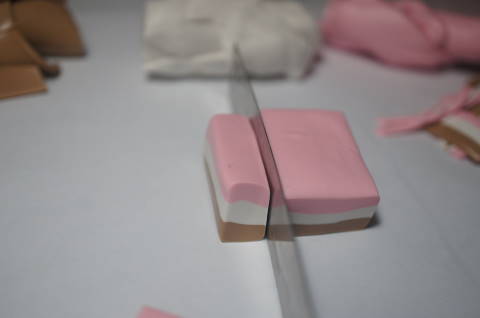
Step 16: Cut out a slice 3.5mm thick.
Step 17: Place a small amount of TLS or Liquid fimo on your fingertip, and dab it on to the back sides of your cookie crusts.

Step 18: Place the ice cream in your cookie sandwich pieces, and press gently but firmly, to start bringing the ice cream to the edges of the cookie crusts. Use your fingers like I did in the video tutorial to shape the ice cream, allowing it to come to the edges of the sandwich but not protrude.

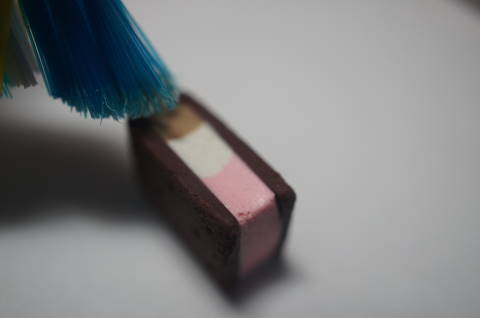
Step 19: Texture the ice cream by gently poking and brushing it with the toothbrush. You aren’t poking it as much as the cookie crust, just gently a little on each side. Then you drag the toothbrush in small strokes across the surface in some areas. Bake according to manufacturer instructions.
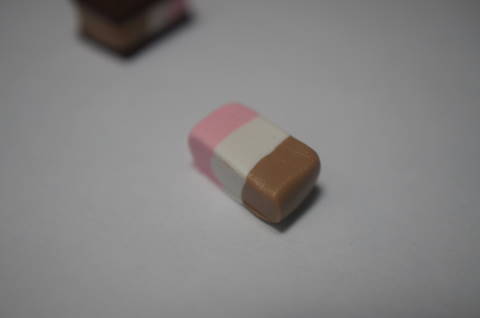
Here is the finished ice cream again, look at my ice cream texture.
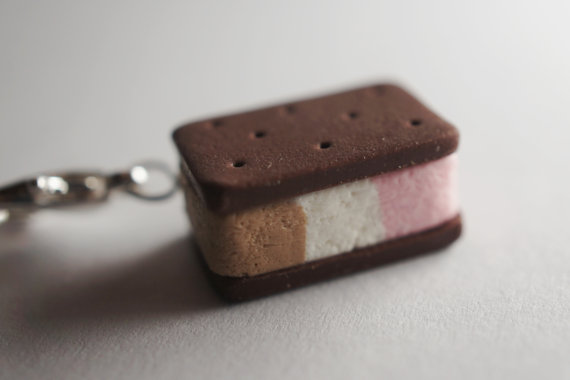
You can see some of the holes from poking it, but gently brushing it helps smooth some areas. I feel this gives it a much more realistic look.
No comments:
Post a Comment